Cupcakes and Sprinkles
A girl with a passion for wandering around wearing an apron and holding a wooden spoon.Archive for August, 2010
Pineapple Upside Down Cake
I never hide the fact from anyone that I am a huge Nigella Lawson fan. In fact if I could I would morph into her rather beautiful voluptuous self tomorrow. But considering this is very unlikely I will just have to stick to using her recipes! I was mooching around her website in the early hours of this morning for no real reason apart from to paw and coo over some of her decadent dessert recipes when I came across one for Pineapple Upside Down Cake. At the time Rob was standing in the corner of his bedroom taking photos of his newly founded black food dye and the mere mention of said cake produced a sequel from the corner. Never missing out on a chance to make him smile it was then decided. Pineapple Upside Down cake it is.
After speaking to couple of other people (my mother included) it turns out this cake is popular one to bake, it seems to go down well with most people. Something I was never completely sure of. I’d had discussions with other people about this cake before and the idea of it never really thrilled me, all I knew about it is that it was like a tarte tatin but without the tarte! That said though, I am the kind of girl who tries everything once so here we go on Rebecca’s first ever Pineapple Upside Down cake (with a twist) adventure!
As I said before this is a recipe adapted from Nigella, it mostly remains intact but I have added a couple of ingredients in to give it my own little twist. If you’re not a huge fan of pineapple you can replace it with apples, pears or plums.
Ingredients
Serves 8
7 slices of pineapple (I am using canned pineapple, but you can peel and chop the real thing if you want to)
11 glacé cherries
3 tsp of the juice
2 tsp sugar
100g flour
1 tsp baking powder
1/2 tsp of vanilla essence (or the seeds of the pod)
1/4 tsp bicarbonate of soda
100g soft butter
100g caster sugar
2 eggs
50g melted dark chocolate
Preheat the oven to 200°C/gas mark 6. Butter all round your cake tin and then sprinkle over two teaspoons of sugar. I used a loose-bottomed baking tin and this worked fine for me.
Arrange your pineapple slices around the tin and place a glacé cherry in each of the pineapple rings and the spaces in between.

Put the flour, baking powder, bicarbonate of soda, butter, caster sugar, eggs and vanilla essence into a food processor (I used a hand held blender and it did the job) and run the motor until the batter is smooth. Then pour in the 3 tablespoons of pineapple juice to thin it a little, this also makes the sponge fluffy.
Pour the mixture over the pineapple rings, and very carefully spread it evenly being careful not to displace your cherries. The mixture will only just cover the pineapples so don’t be alarmed and think you haven’t enough mixture.


Bake for 30 minutes, then ease a spatula (or a knife if you’re careful) around the edge of the tin, place a plate on top and use the collective will of everyone in the room and hope for the best and turn it upside down!

Once the cake is turned out, melt the dark chocolate over boiling water and drizzle over the top of the cake.


And there you have it, a perfectly formed cake. Remember it contains a fair bit of pineapple, therefore, it counts as one of your five-a-day so you’ve no excuse not to tuck in. If this recipe has scared or confused you there is always the option of using this (terrible) tin!

Black and White Rice Crispy Cakes
Simple pleasures; they can be anything. From eating your favourite comfort food in front of the telly, sitting in a toasty warm house watching the rain pour down outside to sitting down with a group of close friends drinking tea and having a good ol’ natter. For me, it’s making, smelling and tasting things that remind me of my childhood.
I first remember making these with mum back when my age was still in single figures. I’d seen the recipe on the side of a Rice Cripsy box, plus everyone at school was making them and not being one to miss out on important 90s trends I stomped home to my mother and demanded we made them, thankfully for the sake of my popularity she obliged. When I make them now, it feels like a warm and fuzzy journey down memory lane. It never does take much to bring out my inner child but this is the one thing guaranteed to do it, and then some. Not to mention I truly believe that my inner child decorates Rice Crispy cakes better than adult Rebecca, so I decided it was her time to shine!
Plus, and not that I am trying to butter her up (much) or anything but my other halves mum can’t resist them! So everyone, let your inner child out to play and get making!
There are many variants of the Rice Cripsy cake, from the liquid ingredients to the cereal that is used – I used a mixture of Rice Cripsys and Coco Pops with white chocolate for some, and Rice Crispys and milk chocolate for others. I also made some with Cornflakes as well. However, since this is such a simple recipe I say play with them to your heart’s content. If you feel inclined to make them extra gooey by adding golden syrup then do, or if like me you are a complete chocoholic make them with different types of chocolate.
Ingredients:
Makes 20 medium-sized cakes
250g milk/white chocolate
50g Rice Cripsys or cereal of your choice
Sprinkles – I went for chocolate and pink sprinkles but this is purely personal preference so go with what ever takes your fancy
Weigh out 250g grams of chocolate into a bowl, and melt the chocolate over melt chocolate over boiling water until you’ve got a pouring consistency. Be aware of the heat as the chocolate can burn if it’s left over the water for too long. Also, if you’re using white chocolate make sure you use hot water, rather than boiling water since white chocolate is prone to splitting if it’s over a very hot heat.
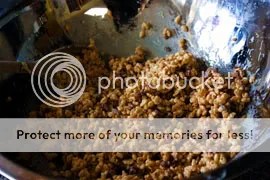
Weight out 50g of the cereal of your choice into a large mixing bowl, and once the chocolate has reached pouting consistency pour into the mixing bowl. Fold in the chocolate until all the cereal has a healthy coating of chocolate.
Using a cupcake baking tray, fill with cupcake cases. Using a teaspoon, fill the cupcake holders with your mixture. Once you’ve filled all your cases with the delightful mixture it’s time to get creative! With your choice of sprinkles, decorate your Rice Cripsy cakes. Once you’ve finished your works of art, put them in the fridge to chill for at least two hours so the chocolate sets.

And there you go you have twenty gorgeous looking cakes that are just calling at you to be eaten. Share with friends, share with family or tell no one about your nostalgic trip down memory lane and keep them all for yourself, I won’t tell if you won’t!

Let the baking commence!
Before I begin, I should probably let all of you know (well the one person reading this) that I do not profess to being a writer, in fact at times I can barely speak the queens English let alone able to write it in an articulate and creative manner. However, that said, with the aid of Microsoft Word’s grammar and spell checker I think I will be able to concoct blog entries that are readable and maybe even a little bit informative and witty. Now, I can’t promise this, but I will certainly give it my best shot!
Right, now that is out-of-the-way I should explain what this blog is all about. Now, I know the name of blog is cupcakes and sprinkles which indicates that the entire blog will be about cupcakes and what is sprinkled on top of them. Dear readers this is not the case. Even though I do have a penchant for cupcakes and indeed all the goodness that is sprinkled on top of them, the main reason I created this blog was to discuss and share recipes about all things sugary. For you see, desserts happen to be my favourite thing in the whole wide world (even more than shoes). If I could, I would start my meal with a dessert rather than a starter…actually if I had my way I would have a three-course dessert! I adore eating desserts, talking about desserts but most importantly I adore cooking desserts. Whether it be baking, boiling, frying or just bashing up bits of biscuits with a rolling-pin, there is no time I feel more at ease when I am attempting I make something for me or other people. Another thing I can’t profess to be actually good at dessert making as I’m not ashamed to admit that I do tend to rebel against recipes. That said though, I am I very good at eating which surely must balance it out?
My dessert making journey first began when I was in primary school, there was nothing more I enjoyed than making the endless supply of jam tarts and cheesy alphabet letters (sometimes without the cheese which I still don’t quite understand) and not to mention the mince pies at Christmas for the church service. The love of making mince pies is something I took home with me. Every year now I’ve made mince pies for my family, it’s become quite the tradition. A memory that also sticks in my mind is a young Rebecca reading through cookbooks and recipes in the Sunday supplements wishing she had the talent to make such tasty looking desserts, and more importantly daydreaming about whether one day if she could successfully make a sugar swirl that all chefs made look so easy! Something I still wonder about to this day (the idea of attempting it still feels me with fear).
I’d love to be able to write about my dessert eating epiphany but I’m not sure I can. In my short twenty years of life I have sampled some delights, from the very indulgent desserts in a three Michelin star restaurant to the very simple well made fruit cake that my grandmother and I made, and of course everything that came in between. I’ve made everything from cheesecakes to pies but I still have so much to learn and this is the aim of the blog to document my delicious dessert discoveries and share them all with you.
Finally, I cannot end this blog entry without mentioning my talented other half (who also owns a successful food blog) who took the beautiful picture which I used for the blog logo. Without his raging compliments I’m not sure I’d have set this up, so all the thanks do have to go to him. Also, I will give him pre-emptive thanks for all the guidance and advice he is going to give me about maintaining a fresh and successful food blog!
On that note, I just want to say that I sincerely hope you enjoy joining me on my dessert journey and I hope you find my blog informative, tasty and even at times entertaining. Now everyone let’s get baking because afterall, life is what you bake it!

